

Hi everyone! In this post, I will be showing you my daily nighttime skincare routine. As you can probably see from the vast amount of products above, it is pretty extensive. So let’s get started!
Make sure to check below for links to all the products talked about in the post!
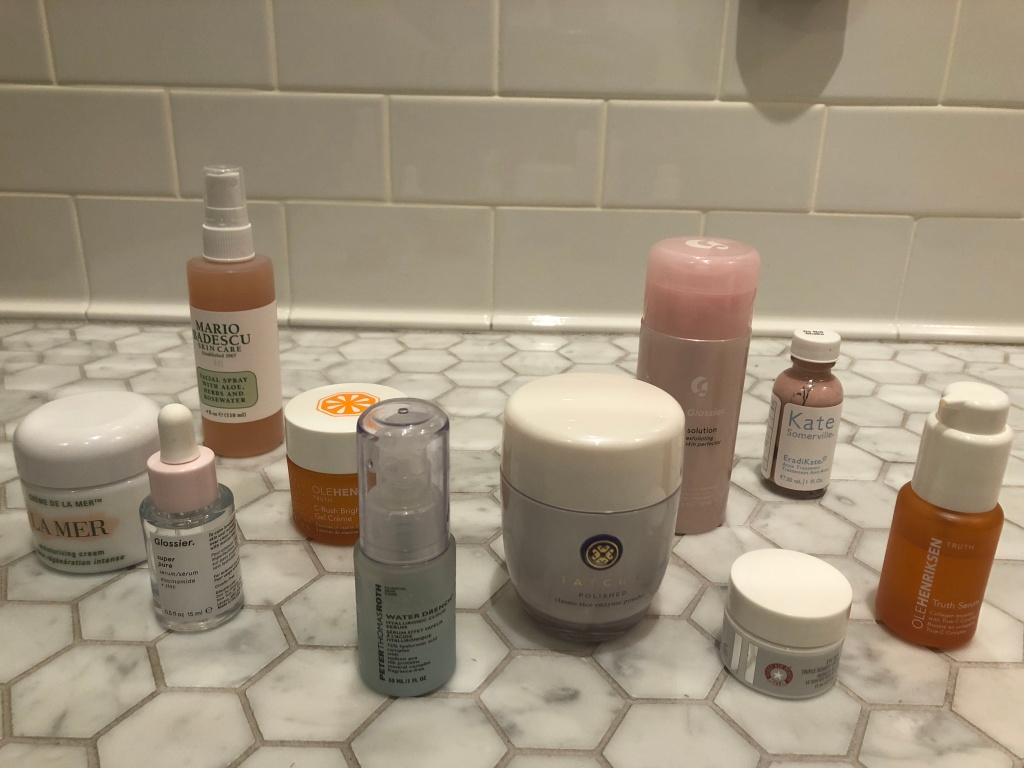
Step 1: Cleansing
My first step is cleansing. I have a few cleansers I use, but I tend to use this one the most. It’s the Classic Rice Enzyme Powder by Tatcha. Essentially, it is a condensed rice powder which when mixed with wet hands creates the traditional foam-like consistency seen in most face washes. I simply wet my face, do as above, then apply it to my entire face and neck, being gentle around the eyes.

After the product is applied to the face, I take a Foreo exfoliator and work in clockwise motions around my face. Doing this helps remove any excess dirt or debris that may be on your face from the day. This exfoliator vibrates, further helping the exfoliation process. To finish the cleansing process, I simply take a damp towel and wipe away the excess soap.
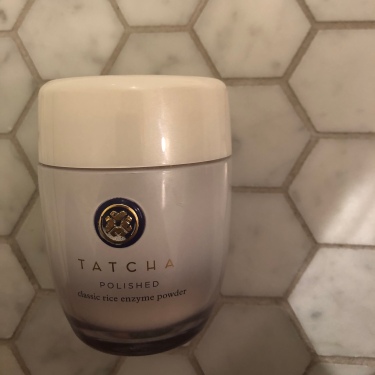
Step 2: Toning
The next step in my routine is toning. The toner I use daily is the Glossier Solution. It contains 10% BHA/AHA/PHA, and salicylic acid which is huge in combatting acne. Since I purchased this product a few months ago, I have seen a huge change in my skin. I get acne way less frequently, and my skin looks better than ever. It has done wonders to my skin. To apply this, I take a traditional cotton round/square and apply around 3 pumps of the toner to it. After this, I take the cotton square and apply the product to my whole face, and neck. When finished with this, the skin is left with a relatively dewy/shiny look, true to Glossier’s brand.
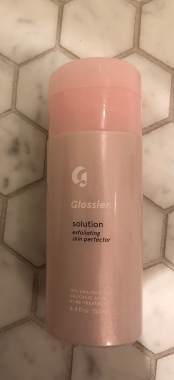
Step 3: Refreshing Spray
After using this relatively harsh to the skin toner, it sometimes may leave a stinging sensation on my skin. To combat this, I like to use one of Mario Badescu’s hydrating sprays. They come in three variants, rose water, cucumber & green tea, and lavender & chamomile. My personal favorite is the cucumber & green tea, I find it to smell the best and be the most soothing on my skin. (I also carry one on my person pretty much daily!!)
Step 4: Serum, Serum, Serum

Serums are key to my skincare routine. Many may find them a bit ‘extra’ but serums can actually do wonders to your skin. for me specifically, I have a growing obsession with them. What started out with one serum nightly has now turned into three (a bit much I know). Given that I am not a dermatologist, or a skin care guru, I’m not sure the exact correct way to layer serums. However, through the articles I’ve read, I think I have a decent idea.
The serum I like to start with is the Truth Serum, by Ole Henriksen. The Truth Serum is a hydrating and brightening serum. It is also anti-aging, containing vitamin C and collagen for a hydrated look all day. I take one pump of this on the tip of my fingers and apply it all over my face and neck. Similarly to the Glossier toner, this leaves a shiny effect on the skin, showing your truly hydrated skin underneath. Along with this amazing look on the skin, the product also smells amazing, a citrus scent of sorts. This is my first step, as, through my research, I found that serums that contain vitamin c should always go first.
Following the Truth Serum, I go in with ‘Super Pure’ by Glossier. This serum simply targets any imperfections in the skin. Formulated with niacinamide, and zinc it is perfect for getting rid of any blemishes. Because of this, I typically don’t put this serum all over my face. Usually, I will place it only in areas that I may have a breakout, or feel one coming. These areas include my forehead, temples, chin, and occasionally my jawline and nose.
Lastly, following both the Truth Serum and Super Pure, I go in with the Water Drench Hyaluronic Cloud Serum by Peter Thomas Roth. This serum is formulated with hyaluronic acid, which leaves immense hydration for the skin. Hyaluronic acid attracts up to 1000 times its weight in water from moisture in the atmosphere, thus leaving skin very hydrated. I apply this to the entire face, making sure to include the neck. This is the last serum I use, as I feel it locks in all the prior moisture put into my skin from the serums mentioned previously.
Step 5: Eye Cream
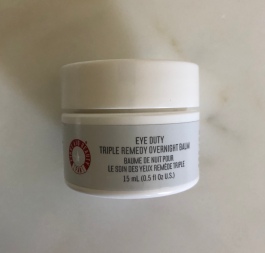
Following the layering of serums, I go in with my eye cream. Lately, I’ve been using the Eye Duty Triple Remedy Overnight Balm by First Aid Beauty. To apply, I just take a pea-sized amount for each eye. Before applying, I like to warm up the product in my fingers for easier application. To apply eye cream, the best finger to use is your ring finger. This is because the ring finger is the most delicate one, and because the skin around your eyes is very tender, this is key. To apply, simply have the cream on your ring finger, and lightly tap around the eye area, remembering to include the lid as well. The eye cream is a huge part of the routine because it’s so important to keep the undereye hydrated; who wants wrinkles?!
Step 6: Moisturizer
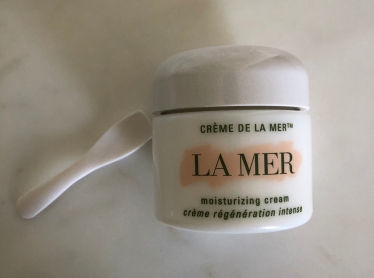
One of my favorite parts of the routine is moisturizer! The one I personally use is Creme de La Mer. It is obscenely expensive, but definitely does the job better than I could ask. This moisturizer is quite a thick cream, so like the eye cream above, it definitely needs warming up before application. La Mer as a brand prides itself on having multiple formulas/consistencies of this creme to suit different preferences. For example, they have the moisturizing cream (as shown above), the soft cream, the gel cream, and the soft lotion. The only difference between these products listed above is consistency, and finish. Each provides an equal amount of moisture, anti-aging benefits, and various other benefits the moisturizer offers. To apply, I use the spoon (as shown in the photo) and take a small amount onto my fingers. After rubbing it together, warming it up I pat it into the skin making sure to reach every area of my face. This product leaves a luminous look to the skin as it hydrates.
Step 7: Sleeping Mask

Last but not least is a sleeping mask. I only occasionally do this, because I tend to get a bit lazy. A sleeping mask goes right on top of your moisturizer and other products, after your routine. The one I personally use is the Watermelon Glow Sleeping Mask by Glow Recipe. This is a relatively new addition to my routine, but it is a leave on mask that sinks into your skin overnight. After waking up, you simply wipe it off with a damp cloth and continue with your morning routine. This leaves your skin perfectly hydrated and glowing for the day.
PRODUCTS:
Facial Exfoliator – https://www.foreo.com/luna-play-plus
Toner – https://www.glossier.com/products/solution
Refreshing Spray – https://www.ulta.com/facial-spray-with-aloe-cucumber-green-tea?productId=xlsImpprod15471023
Serums – https://www.sephora.com/product/truth-serum-P42343?skuId=1910470&icid2=products%20grid:p42343
https://www.glossier.com/products/super-pure
https://www.sephora.com/product/water-drench-hyaluronic-cloud-serum-P222818
Sleeping Mask – https://www.sephora.com/product/watermelon-glow-sleeping-mask-P420160?skuId=1955764&icid2=products%20grid:p420160

may i asked you about the serum? did you put the serum, three of them in one step? or you just rolls em day by day?
LikeLike
I layer them, so all in one step!
LikeLike
woah! okay then! thank you! 🙏🏼
LikeLike